Google to Google Calendar Migration
In some scenarios it is necessary to migrate Google Calendar data manually between two Google accounts.
Usually, this is very simple.
Exporting from Google Calendar
- Open Google Calendar on the source account
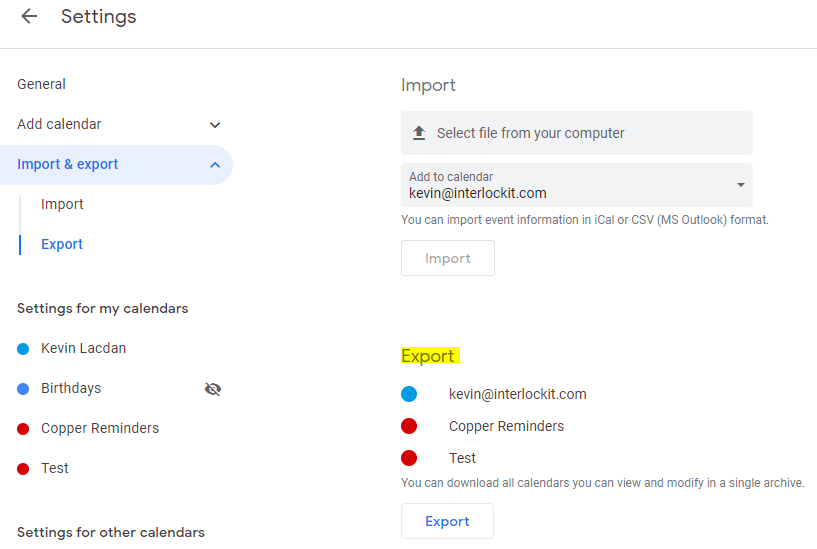
- Go to Calendar settings > Import & Export
- Click Export, and a ZIP file with all calendars will download to your computer
- Extract the ZIP file, noting there is a separate .ics file for each calendar
Importing to Google Calendar
- Open Google Calendar on the target account
- If they don't already exist, create an appropriate target calendar for each calendar you will import to this account. Note, often you may not want to bring the primary calendar of the source account into the primary calendar of the target account.
- Go to Calendar settings > Import & Export
- Select the .ics file you intend to import
- Select the appropriate target calendar
- Click Import

Dealing with large calendars that fail to import
In many cases, a larger calendar will fail to import. This is because of limitations in Google Calendar's import capabilities. The solution is to manually divide the .ics file into several files, importing each separately. Usually, if each file is under 2.5mb it will import without issues, but in some cases you will need to split the files smaller.
Notepad++ is used in the example below.
Open the .ics file in Notepad++ and identify the headers, events, and footers of the .ics file. The headers are every part of the file that come before the first event, and the footers are every part that come after the last event. Everything encapsulated within "BEGIN: VEVENT" and "END:VEVENT" is an individual event. See screenshot below for example of Header, Event, and Footer sections.
The concept of splitting the file is quite simple. We want to create multiple files with the Header and Footer sections intact, while splitting the event content across each of our multiple files, keeping each individual event intact. This is where Notepad++ comes in handy, since it gives you a line reference to the left of each line, so you can keep track of which events you are including in each file.
These example instructions assume you want to split a single .ics file into 2 files:
- Open the original .ics file and identify the headers.
- Create two new blank .ics files (name them appropriately to keep track of them) and paste the headers into each file.

- From the original .ics file, select roughly the first half of events by starting at the first line with "BEGIN:VEVENT" and choosing a line that contains "END:VEVENT" somewhere near the middle of the file. Copy-paste this into the first new .ics file.

- From the original .ics file, select the next half of events after the data you copied, which should be the next event beginning with "BEGIN:VEVENT" all the way to near the end of the file, the last line that contains "END:VEVENT". Copy-paste this into the second new .ics file.

- Open the original .ics file and identify the footers.
- Copy-paste the footers to the end of each of the new .ics files.
- Save both of your new files and proceed to import them one-by-one.
If you have questions or if you would like someone from our team to handle this for you, you can fill out this form.