Thursday, March 1, 2018

G Suite Calendar Interop: share free/busy data between G Suite and Office 365!

Google has recently released a new version of Calendar Interop which includes the much-anticipated support for Office 365. In light of this--as well as the old version being deprecated--we have run into a few clients that found the available instructions a bit hard to follow.

That's where Interlockit.com comes in to save the day! We're getting straight into the technical details in this post, so put on your geek face and pour yourself a fresh coffee before jumping in.

Prerequisites!


  • Access to a G Suite Super Admin account.
  • Access to an Office 365 Global Admin account.
  • One spare G Suite license to use as a role account.
  • You will need to know how to connect to Exchange Online Powershell and run simple powershell commands.
  • Users must not have matching accounts in both G Suite and Office 365; both systems will prioritize internal users and ignore Calendar Interop if an internal user is found during lookup.

Create role account


In order to facilitate sharing of calendar information between your G Suite and Office 365 tenant, a role account must exist on each side.

On G Suite


  • Sign into your Google Admin Console and go to the Users section.
  • Configure a new regular user account (no admin privileges) with an email address of your choosing. I recommend “interop@yourgsuitedomain.com”.
  • It is recommended this account be used exclusively for calendar interop.
  • Go ahead and set a permanent password right away and keep it ins a safe place. We will need to log in to this account to complete steps later in this guide.

*tip: leave the Admin Console open until you have completed this guide, as you will need it in following steps.


On Office 365

  • Configure a new mail-enabled user (no additional privileges) using the New-MailUser cmdlet in Exchange Online Powershell. Example:

    New-MailUser -Name "Calendar Interop" -ExternalEmailAddress interop@externaldomain.com -MicrosoftOnlineServicesID interop@your365domain.com -Password (ConvertTo-SecureString -String ‘yourpassword' -AsPlainText -Force)

  • The name can be anything, so be descriptive.
  • This email address must not exist in Office 365 as a user or contact. The role account shouldn’t need to receive mail, so it doesn’t really matter what address you use here.
  • This email address must use an accepted domain in Office 365. This address will not accept mail, but behaves like the user ID for the role account on your tenant.
  • Set any password you like. It must be within ‘single-quotes’.
  • It is recommended this account be used exclusively for calendar interop.

*tip: leave Powershell open until you have completed this guide, as you will need it in following steps.

Create an Office 365 availability configuration


In order to give our Office 365 role account the ability to feed free/busy data to G Suite, we must create a new availability configuration and assign it to the role account using the New-AvailabilityConfig cmdlet in Exchange Online Powershell:

New-AvailabilityConfig -OrgWideAccount “Calendar Interop”

Make sure you use the same name in quotes used when first setting up the Office 365 role account.

Configure the G Suite admin console

  • Sign into your Google Admin Console and navigate to Apps > G Suite > Calendar
  • Scroll down and expand the “Calendar Interop Management” section.


Add the availability address space in Office 365

  • From your G Suite admin account, open Google’s Credential Generation Tool. Check the box, and click “Generate new credentials”


  • When prompted, sign in with the G Suite role account you created earlier. It will ask for permission to access calendar data. Click “Allow”.

  • Click “Download”, and save the credentials.dat file somewhere safe--you will not be able to retrieve this file again in the future without breaking the setup, requiring you to repeat all the steps in this section.


  • Click “Choose File” and select the credentials.dat file you downloaded in an earlier step.
  • Select “Exchange 2013 or newer, including Office 365”
  • Enter the user ID of the Office 365 role account, in this example we are using “interop@your365domain.com
  • Enter your G Suite domain in the field asking which address space you wish to add to exchange. In this example we are using “yourgsuitedomain.com”.
  • Click “Show Exchange Setup”.
  • You will be presented with the following page:

  • Copy-paste the above section of green text into Exchange Online Powershell. You may need to hit “Enter” once each command completes, until all the commands have been run.

Create contacts for your G Suite users in Office 365


In order for Office 365 to display the free/busy data for a G Suite user, that user must be represented as a contact in the Office 365 system:


You’re all set!

Now you can create a test event in a G Suite user account and an Office 365 user account respectively, to test that each are able to see the free/busy indicator of the other.

*tip: it may take a few hours for the Exchange Online settings in Office 365 to propagate, so if your initial tests don’t work, wait a few hours and try again before taking troubleshooting measures.

Google provides a Troubleshooting tool but it is limited in functionality. If you get lost, give me a shout over at Interlockit.com and we'll get you sorted in no time! Now, don't you feel like you deserve another coffee?


Thursday, February 22, 2018

Copper CRM integrated contact us/sign up form for your website using Google Forms

Copper customers frequently ask us about setting up web forms that will automatically create a person (or lead) record and send a personalized email response upon submission.


Copper has posted a solution based on Wufoo and Zapier but it doesn't send an automatic email reply. It's also simpler and cheaper to use free Google Forms plus free Mailchimp, so we built it!

We loved this solution so much, we opted to use it on our own website.

Our live Contact Us Google Form: http://www.interlockit.com/Home/contact-us

If the email address submitted does not already exist in Copper, a Lead record is created instantly and a welcome email is sent using Mailchimp's Automated Welcome Email feature:

If the email address is found the phone number submitted is compared and updated if needed.

In both cases a Copper CRM Task is created to followup and is assigned to the user of your choice, plus Mailchimp sends a personalized welcome email.

You can even use Mailchimp to schedule automatic follow-ups, which is what we did for our Blink Reports Software Free Trial Sign-ups. This is another Google form we integrated to Copper CRM and to our Blink Reports for Xero Accounting software running in Python on Google App Engine/Google Cloud Platform. Mailchimp handles DRIP marketing to our free trial signups with a scheduled series of helpful emails.

In the case of the Contact Us Form 100% of the code runs inside the Google Cloud using Google Apps Script. The benefits are speed, simplicity, reliability, and security. It's all managed by Google's massive Cloud Computing resources and the world's best security team. All security for editing the online form and reviewing past form submissions in Google Sheets is managed by your existing Google Account logins.

Here's a code excerpt for the techies like me:

So what does it cost?

  • It's FREE if we can become your G Suite license Reseller for 10 or more users, which is at no additional cost to you.
  • Otherwise cost is $10 per month plus a small setup fee of $99 with discounts available for buying less than 10 G Suite users through us
  • Mailchimp is free for up to 2,000 subscribers or $10/month for unlimited emails
Certainly reach out to us at http://www.interlockit.com/Home/contact-us to sign up or send us any questions you may have!


Thursday, February 15, 2018

Google Drive Backup and Sync for Google G Suite

As we discussed in our prior post Google Drive Backup and Sync plus Google Drive Streaming both work great with your Google G Suite for Business account.

In this post we'll show you how to backup your documents folder, Quicken files, photos and videos with Google Drive.

Google Drive Backup and Sync can both Backup and Sync files to your computer but we recommend turning off the Sync feature and using Google Drive Streaming with your G Suite account. This avoids the consumption of hard drive space and the security risks of storing files locally on your computer.

Download Drive Back and Sync here: https://www.google.com/drive/download/backup-and-sync/ and run the executable to start the installation.

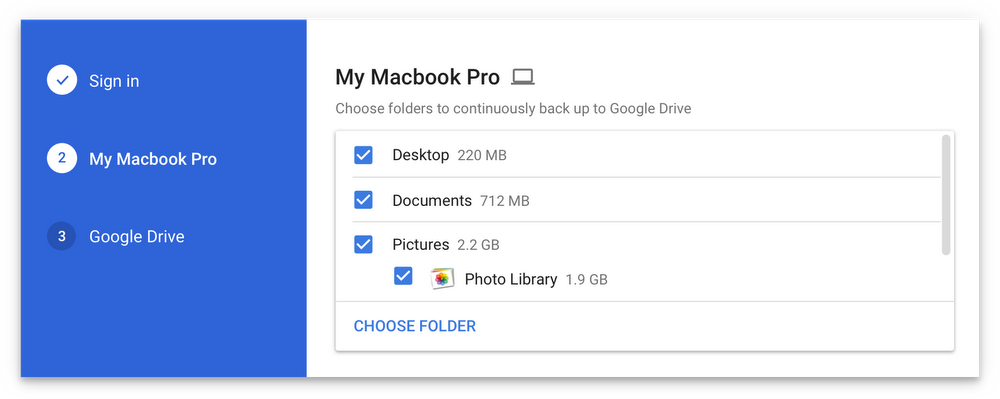
During the initial setup choose the folders you would like to backup, but don't turn on Drive Sync.

Your preferences should look something like this:

Note that we've chosen to backup various folders from the Home Theatre PC (HTPC) including my kid's local user directories where their valuable Minecraft levels are saved. 

We've also enabled the uploading of photos and videos to Google Photos. This way any new photos saved to the selected folders on the local drive from my Sony camera are automatically stored in Google Photos and accessible from any device anywhere, anytime. You can choose Original quality or the free unlimited High quality mode.

Note the "Removing items" option. If you want files you delete in Google Drive from the cloud or from the local computer to be deleted everywhere without prompting then choose "Remove items everywhere". You can also be prompted to remove items or you can choose not to delete items on other devices which may leave lots of orphaned files behind.

If you have a large amount of data to backup the initial backup could take many days to complete but once finished it will only upload the changes as they occur.

If your G Suite license is for G Suite Basic ($5/user/month) you can store up to 30 GB of files, photos (original quality), and emails. Upgrading to G Suite for Business will give you Unlimited storage for $10/user/month (1 TB/user if 5 or less users on the domain).


G Suite for Business at $10/user/month is one of the most cost effective unlimited storage options available since it includes the full G Suite of software, Google Vault and more in the price. Dropbox charges $10/user/month for 1 TB of storage but it does not include email, calendar, Google Docs, Google Meet video conferencing, Google Sites, etc.

Google Drive Backup and Sync is also an excellent replacement to Crashplan who exited the consumer backup space this year.

Certainly contact us at Interlockit.com for assistance or to upgrade to G Suite Unlimited storage!

Thursday, February 1, 2018

Backup and Sync for Google Photos and Google Drive plus Google Drive File Stream for G Suite

Are you confused about which Google Drive software tools you should install on your Windows PC or Mac desktop for use with your G Suite for Business account versus your personal @gmail.com account? If so, this first in a series of blog posts is for you.

Working with files purely in the cloud like Google Sheets, and Google Docs is the ideal way to go, but often we need to work with more traditional files stored on our desktop computer like photos, Microsoft Word/Excel, and accounting data like Quickbooks.

Google Drive Backup and Sync

Backup and Sync is an app for Mac and Windows PC's that backs up files and photos safely in Google Drive and Google Photos, so they're no longer trapped on your computer and other devices.

Backup and Sync works for both Google Photos and Google Drive. It replaces "Google Photos Desktop Uploader" and "Google Drive Desktop Sync." Please ignore the click bait headlines that created fears in our customer base that "Google Drive" was going to be shut down. Backup and Sync is the replacement and is an awesome upgrade of the legacy Desktop Sync utility.

As of May 2017 Google Drive had over 800 million daily active users and hosts over 2 trillion files. That's a massive growth curve from 120 million active users in 2013. Google Drive with its lower storage costs and included suite of software is a huge long term threat to popular file sharing solutions like Dropbox and Box.Net.

Google positions Backup and Sync as being for Personal users and Drive File Stream for Business users but using the two in combination has some big benefits that we'll dive into later. Backup and sync is their consumer sync client but G Suite organizations can use it too.

Google Drive File Stream

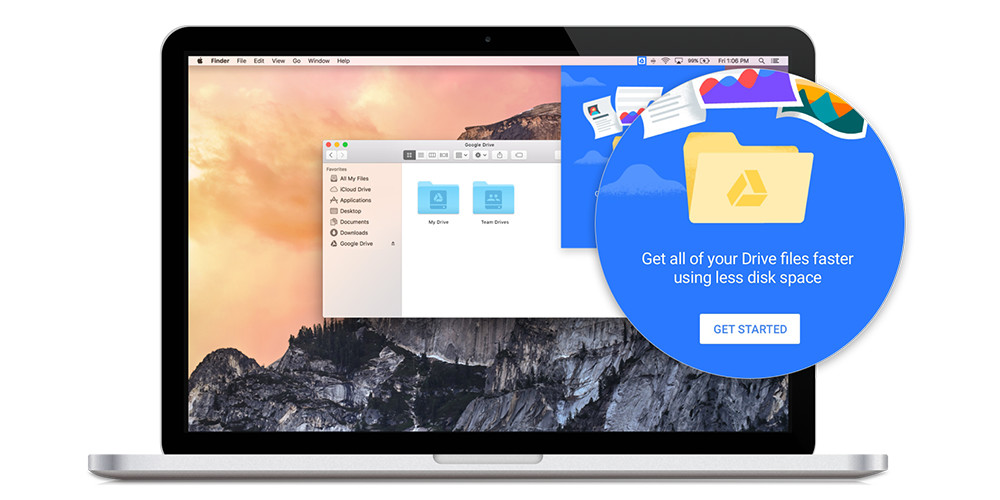
Drive File Stream lets you see all your files in Google Drive without using storage space on your computer. It behaves much like a traditional mapped network drive letter in Windows File Explorer or a Network Share in Finder on a Mac. It's a key improvement that is allowing our customer base to ditch Windows File Shares for good. Files are streamed to your PC from the cloud on demand for use in your favourite desktop apps.
Drive File Stream includes the ability to save specific files and folders offline, including Team Drives so you can still be productive offline without installing Backup and Sync. It's simple to open files like PDF's from Adobe Acrobat Pro and Microsoft Word directly from your Google Drive. Each time you press the Save button in your favourite app your changes are synced to Google Drive in the cloud. Version management is automatic so you can always roll back to a prior revision of your file.

However, Drive File Stream does not upload your images to Google Photos nor can you tell it to automatically backup your Windows Document or desktop folder from your PC. You can read more about the differences between them here.

On our next blog post we'll dive into installing Backup and Sync for G Suite organizations. In the mean time if you have any questions or would like pricing on Google Drive please contact us at Interlockit.com!

Tuesday, January 9, 2018

Achieving weight loss and fitness goals with technology

I love crafting business solutions and making software integrate seamlessly for our Interlock IT customers, but it's even better when those solutions can be leveraged to help with personal goals like weight loss and fitness.

Hopefully this post can help you achieve your weight loss and fitness goals by using technology to integrate daily activity level, exercise, and calorie tracking. Did you know that you can even sync your Polar Training Results and Training Targets into your G Suite for Business Google Calendar? This is a great example of IOT (Internet of Things) where multiple devices and software can work together elegantly.

Background and issue

I've been running consistently for 3 years, despite experiencing every pain imaginable as I adapt my lifelong computer nerd body to running.

One of my issues was being very hungry after a Sunday long run and knowing that I needed to eat some extra calories to refuel. What I didn't want to do is overeat and negatively impact my weight loss for the week. A fitness tracker live integrated to MyFitnessPal is a perfect solution to know how much to refuel and still achieve your weight loss goals.

Beginner tips

I recommend that beginners start with a couch to 5K program like C25K. I started with Runtastic and a Wahoo heart rate monitor in May 2015 which has similar beginner walk/run training programs. In fact, I've learned that easy slow running and keeping my heart rate below 130 for the majority of my training is a key to avoiding overuse injuries, consistently enjoying running, and race success. The hard push to 5K I used to do in University was inefficient and uncomfortable, and took the joy out of the sport.

My 2018 Goals

  • Lose 10 to 15 pounds of weight by April 30th
  • Beat my half marathon personal record (PR) of 1:38:14
  • Complete my first full marathon
I completed my first half marathon and set my PR in May 2017. This November 2017--despite sticking religiously to the Polar half marathon training program--I failed to set a new half marathon PR partly because I gained some weight. Losing ten pounds saves a whole minute on a 5K and almost nine minutes on a full marathon. You can see all my PR's and running stats on Strava

My Technology Solution for fitness and calorie tracking

MyFitnessPal

Setup and Configuration

The screenshots and setup below are specific to integrating Polar devices with MyFitnessPal but do some homework and you'll see that Garmin watches, Fitbits, Apple Watches and more can integrate your daily activity and training to MyFitnessPal too.


Connect Polar Flow App to MyFitnessPal

  • On your smartphone open the Polar Flow App, Settings, and toggle on Connect MyFitnessPal. Follow the prompts to login and Authorize Polar to read and write to MyFitnessPal.
  • Note that you can integrate your Polar Training Results and Polar Training Targets to your G Suite for Business or personal Google Calendar with the two toggles in the Polar App Settings (this setting is only available in the Polar Flow smartphone App).
  • Alternatively, you can configure the MyFitnessPal integration via your web browser. Open https://flow.polar.com/settings, click the Connect button for MyFitnessPal and follow the prompts.

  • Next, inside MyFitnessPal on the web turn on Polar Flow Step tracking via the menu bar Apps, Steps. This means both exercise tracked and your steps for the day will be included in the "Exercise" Calories of MyFitnessPal:

Usage

Once Polar Flow is integrated to MyFitnessPal you should see "Exercise" automatically updated in the MyFitnessPal App and on the web from Polar Flow:
The data in the screenshot above shows my daily target of 1500 calories not including exercise; my food logged so far today after my lunch and afternoon snack of 1146; and my calories burned from exercise and steps of 520; leaving 874 calories to eat for my dinner and evening snack. The 1500 calorie target may see too low but remember that this is before exercise and steps (plus, I'm a small guy).

The exercise calories of 520 consists of my run, stretching, and Polar's estimate of my steps for the day:

Tip: Be careful not to eat the example 195 calorie "Polar Flow Calorie Adjustment" on workout days. It assumes that you'll achieve your Polar tracked daily goal of 100% or about 10,000 steps in addition to your workout so it can be overstated on your workout days. Throughout the day you'll see it change based on actual steps whenever your Polar watch syncs to the Polar Flow App. If you review the prior day "Adjustment" calories for the first while you'll get a better feel for how your activity impacts the adjustment. The next day (after a morning sync from your watch) is it adjusted to actuals and the calorie adjustment can even go negative (if you enable this setting in MyFitnessPal) to account for a low level of activity outside of your workout recorded.

Your Progress/weight is also updated automatically from Polar Flow to MyFitnessPal by either using the Polar Scale or by manually updating your weight in Polar Flow on the web in Settings: https://flow.polar.com/settings. You could enter your weight in MyFitnessPal directly but updating it in Polar Flow helps keep its calorie burn calculations more accurate and updates MyFitnessPal anyway.

Conclusions

Just like we can integrate cloud software for our business customers you can integrate your consumer devices into your Google Calendar, MyFitnessPal, Strava, and more to take advantage of each product's unique strengths. With cloud based solutions of today, integration is easy and reliable. Long gone are the days of running complicated unreliable synchronization software on your desktop computer just to get emails on your Blackberry or Palm device, yet many small businesses still suffer through similar headaches with their business software and email systems.

Contact us today at Interlockit.com and let us remove your IT headaches and software integration challenges!

Wednesday, August 16, 2017

Google's backup solution versus Crashplan from Code42 - clarified!

In a recent article by Code42 titled 'Google Drive is a Bad Backup', they attempt to explain how Drive fails as an adequate backup solution. Occasionally, we do encounter users who ask if Google Drive is a reliable solution to store all their invaluable data, and if it's necessary to consider a third party backup utility. This post aims introduces an answer and also clarify the misstatements from the Code42 article.

One thing we can all agree on; Google is constantly updating and adding improved features to it's applications. Google Drive is no different and is being upgraded into a robust backup tool. Instead of having files reside inside the Drive folder, Drive can now monitor and backup files inside of any folder you point it to. This can include your desktop, your entire documents folder, and even other more specific locations. The new feature is out in the form of a new app called Backup and Sync.

Code42 claims, "Google Drive puts the burden on your users. Files don’t just appear in Google Drive. Your users have to manually select and upload each file for sharing or saving. When used as backup, this puts a huge burden on your users. You’re asking them to stop what they’re doing, several times each day, to manually back up every new file they’ve created". This simply isn't true, Drive has auto sync capabilities that lets users choose the folders they want to sync so they don't have to select each file and upload manually. Check out this support document from Google that explains how.

Code42 goes on to claim, "Google Drive doesn’t cover all your data. Users want to back up all their files. But they only want to share some of them. In fact, some of users’ most valuable files are those they hold most closely—and are reluctant to share. Anything they choose not to manually share is not backed up and can’t be recovered in a data loss incident". Again, not true. By default nothing is shared and remains private. Users aren't required to 'share' a file in order to back it up or sync it with Drive. Files that are not intended for sharing can easily be synced and backed up into Drive. See 'change your back up and sync settings' on this support page.

Another false statement by Code42; "Google Drive makes user error everyone’s problem. Google Drive is focused on moving work forward—not going back. If a user accidentally deletes a file and doesn’t realize it in time, it’s lost forever. Worse, that deleted file is now gone from everyone’s Google Drive". Google Drive, although focused on moving work forward, also offers the chance to recover deleted files. You can do this via your trash bin. If the file still isn't visible, you can contact a Google Drive specialist from your support page (in the admin console) to assist you. Learn more about file recovery. In addition, Team Drives were introduced to allow teams to effectively collaborate on files without losing access in case the 'initial owner' of the file leaves the team. Unlike files in My Drive, files in Team Drive belong to the team instead of an individual. Even if members leave, the files stay exactly where they are so the team can continue to share information and get work done.

Google understands that users already keep their most important files and photos in different places, such as a desktop, phone, USB drive, SD card etc. It's a challenge to keep all these scattered files secure, backed up, and organized, which is why Backup and Sync was created. It’s essentially the latest version of Google Drive for Mac and PC and is an easier, speedier, and much more reliable way to protect files and photos safely in Google Drive and Google Photos. This means files are no longer trapped on your computer and other devices. Simply choose the folders you want to back up, and the app will take care of the rest!
This is a huge improvement from the previous iteration of Drive for Mac and PC but it's not perfect for businesses, which is why it's primarily intended for consumer users, for now at least. It's also important to keep in mind that Backup and Sync is not a replacement for a restore tool. If your computer crashes, you will not be able to use Backup and Sync to restore your operating system. Google recommends G Suite users to continue using Drive for Mac and PC until the new enterprise-focused solution, Drive File Stream (currently only available in Early Adopter Program), is made generally available to all G Suite domains later this year. Drive File Stream will allow users to access huge corporate data sets without taking up the equivalent space on their hard drives.

Ultimately, Backup and Sync takes the chore out of the traditional drag and drops or organizing files and folders to get them synced to the cloud. Check out Google's support page to learn more about the new app and possible uses you may have for it. Give us a shout if you'd like to learn more about G Suite and upcoming features.

Friday, August 4, 2017

Become a power G Suite administrator with this handy checklist!

G Suite applications create a world of possibilities for businesses of all sizes. They present an intuitive way of working that goes beyond simple business email systems. From real-time document collaboration to engaged video conferencing, the vast range of tools make it incredibly easy to boost user productivity and data security. With such great usability and functionality, it's imperative to understand the utility of the console that administers these powerful applications; The G Suite Admin console.
The G Suite Admin console is designed to provide administrators an easy way to add users, manage devices, configure security, and tweak several other settings. Centralized administration allows users to work efficiently and the ability to focus on more important tasks. The G Suite Admin console also provides access to advanced insights and usage reports. If configured and used correctly the console can be a powerful way for administrators to optimize G Suite for their users. With a broad array of functions (which can seem intimidating at first), we hope this short list will give you a better sense of administrating G Suite.
  • Add users and manage Google cloud services
    • If you're a growing company, you'll probably be hiring new staff. You can add new users via the admin console individually or several at once. Once new users have been added, they can begin communicating and collaborating with fellow users immediately.
  • Add layers of security and privacy 
    • G Suite provides excellent security features to protect your invaluable data. It's important to utilize features like enabling 2-step verification across your domain. 2-step verification blocks the majority of hacking methods to better protect your organizations data. If you haven't yet enabled 2-step verification, it's only a matter of time before one of your users has their account compromised. This can lead to an embarrassing email broadcast to your customer base!
    • The console also provides access to user behaviour reports designed to help identify users that are disregarding security procedures. The reports show risky user actions, such as the installation of external apps that may threaten the integrity of the user's account.
  • Control users' access to services and features
    • Administrators can activate/deactivate or even tailor how certain services work for specific users or everyone. This means users can only see the services they have been granted permission for when signed in. For instance, you can activate Google Hangouts for your support team while exclusively allowing the marketing department to share public Google Sites. (Note: by default, G Suite applications are turned ON for all users and there is no action required to make the services available to users.)
  • Use Google training and deployment resources
    • To ensure a smooth rollout, be sure to use Google's learning resources that contain guidelines for in-app training. We often find frustrated users abandon the system simply due to lack of education and understanding. Adopt best practices and learn hidden, yet useful features, by utilizing the videos, tips, and guides in the G Suite learning centerThe deployment site features templates for building an in-house learning center and planning a successful rollout.
    • You can also set Chrome extensions for G Suite training that facilitate self-paced interactive lessons for your users. For full featured and thorough training on G Suite, we recommend getting in touch with us (Interlockit.com).
  • Grant admin privileges to other IT staff members
    • Share the power! But we recommend doing so very carefully and only with trusted users that are responsible for managing users, devices, and configuring other management settings. Remember, granting admin permission to a user means you are giving them access to the admin console!
  • Google's mobile device management for iOS, Android, and Chrome devices
    • Users by default have access to their G Suite accounts from their mobile devices. This creates the need to manage and enforce security policies to protect the user data. G Suite's mobile device management tools provide a way for admins to remotely wipe data from lost or stolen devices. Admins also have visibility on mobile audit logs that help determine usage.
  • Add domains as aliases or separate entities for free
    • Unfortunately many admins don't know that the admin console allows organizations to add many domains at no extra cost. Users can be linked to identities at one or multiple domains without compromising their ability to share services. Admins can also add domains separately or as a domain alias.
Still need assistance with the admin console? No problem! InterlockIT.com offers training, not only on G Suite applications such as Gmail, Drive, and Calendar, but also on the feature rich admin console for administrators like you! We're here to help you with a range of things, from deployment and migrations to training and day to day management. Get in touch with us today to learn more about administrating G Suite for your organization!

Monday, July 17, 2017

Security breach! How to prevent your G Suite domain from getting hijacked

Legacy security solutions are no longer as effective against todays clever hacking methods, and on-premise hardware can often lack sufficient scale and performance to protect internet connected application infrastructures as they grow. As more organizations move their operations online, they need a cloud-based security solution that can defend their domain, email, valuable data, and in some instances, brand image.

Lately we have witnessed increasingly clever phishing attempts in our customer base. Some of these attempts are so sneaky you'd need to do a double or triple take to notice it as a red flag. Take for example a long time customer of ours who was sent an email with an almost identical domain name (only one letter was different). The email came from the actual domain name, meaning that the hacker had invested the time and money to purchase and configure the domain with the intent to hijack the real customer domain. Luckily our customer realized it was a malicious email and immediately deleted it and reported the domain to Google.

G Suite's cloud based security protocols are top notch. Google recently added a new security feature in Gmail to warn users when responding to emails sent from an external domain and not someone in their contacts. This feature increases awareness against forged email messages, impersonation, as well as common user-error when sending mail to incorrect addresses.
When a user clicks 'reply' in Gmail, Google scans the recipient list, including addresses in CC to verify the risk level. If a recipient is external to the user’s organization, not present in their Contacts or not someone the user interacts with regularly, the warning is displayed automatically. This is a subtle, yet powerful, way to keep your users vigilant.

A valuable step to take to prevent a hijacking is to create a rule in Gmail to bounce emails from domains that have close spellings. Here's how:
1. Login to your G Suite Admin account.
2. Go to Apps ---> G Suite ---> Mail ---> Advanced Settings
3. Under the Spam Section, Blocked Senders ---> Configure
4. Enter a (very) short description for the summary of what's being blocked
5. Use an existing list or create a new list for the addresses that are going to be rejected (you can choose single or multiple domains and single or multiple email addresses.)
6. Optional; you can edit the rejection notice that the sender will receive in the blocked bounce-back (leaving it blank will use the default).
7. "Bypass this setting for messages received from addresses or domains within these approved senders lists." - this option can be ignored (defaults to being checked off, but does not matter unless a list is created or used in this section).  This option also serves the purpose of allowing exceptions that can still send (eg. malicious.ca is blocked, but hacker@malicious.ca is allowed, or malicious.ca is blocked, but hackers.malicious.ca is allowed to bypass).

As long as we live in a world of technology, attackers will always look for ways to target us. As the internet evolves, the methods and techniques used by these attackers evolve along with it. It's important to understand that vulnerabilities do exist and the best way to avoid a compromised system is to set preemptive measures like the ones G Suite offers. The challenge with web security lies in that very changing nature. True cloud solutions offer the latest and most secure methods to provide the utmost protection for your online assets.

To learn more about cloud security and G Suite, contact Interlock IT today!

Monday, July 10, 2017

How to choose the right Client Relationship Management (CRM) solution

Many businesses today rely on client relationship management (CRM) systems to segment data and target clients. Despite the need for a reliable solution, most CRMs are impractical and sometimes even hinder user productivity.

In our many years of experience, the biggest of these problems (and most other software systems) is ease of adoption. CRMs were made to help users scope and keep up with their contacts and projects. Ironically with most CRMs out there, the opposite is true. They're clunky, difficult to learn, and counter-productive since they usually require you to remember to manually enter data or synchronize contacts. Overly convoluted systems can hinder the sales process and consequentially averse team members from even using the "solution". In order to have effective adoption it's imperative to have a solution that your team will actually love to use!

So how does one decide which CRM will work for their team? Understand this; most employees need a system that eases their workflow and maximizes their productivity. If users reject the existing CRM system, you need to take a step back and reassess what the problem is. Does it require too much manual data entry, does it not automate tasks well, are integrations to third party applications limited? These are all important questions to ask before you make a decision on which CRM to purchase. Focus on your team's needs and more importantly, on existing pain points. We see many CRM solutions pretending to be cloud and easy to use -- don't get blinded by their shininess because they're worthless if your team won't even use them.

Using a CRM that reduces, or altogether eliminates, manual data entry is incredibly important. Studies have shown that on average, sales rep spend nearly 6 hours a week entering activities and contacts into a CRM. This cripples performance and eats up valuable time. Copper scrapes contact information from your inbox to pre-populate it in your CRM so that you can add email addresses, phone numbers, and other contact data with a simple click of a button. You can also automatically link to all related emails, files and calendar events across the entire company. It's a powerful CRM that saves heaps of time while mitigating data inaccuracies.

Simply put, use a CRM solution that is easy to adopt, easy to implement, and easy for your team to use. Our recommendation is Copper. It's a true cloud based CRM that is by far one of the best looking, functioning, and usable CRMs out there! It was purposefully built to seamlessly integrate with the tools many sales teams are using, such as G Suite. It's not only an aesthetically pleasing CRM, but one that's very easy to work. If you know how to use Gmail, you know how to use Copper - there's barely a learning curve and your team will be delighted to use it. Copper knows very well that sales teams spend most of the day sending messages, scheduling meetings and creating follow-ups via email, so they created a system that resides right into your inbox so once you download the Gmail or Inbox Chrome Extension, every communication is in one centralized place.

With Copper, users reap the benefits of enhanced customer acquisition and retention, sales automation, and a repository of all customer information. It works perfectly from small to medium sized businesses to larger companies like Udacity and Peugeot. It's a scalable solution that helps get the job done simply and beautifully. Have a feeling your team could be more productive? Click here to try Copper for FREE or contact us to learn more.

Friday, June 23, 2017

Is your company domain safe from spoofing?

There's no doubt that in the last two decades email has become the backbone and primary source of business communication. Businesses rely heavily on emails to communicate internally with their own staff as well as externally with clients and partners. Gmail alone has well over one billion monthly active users. Such heavy email dependency requires immense reliability and security. Unfortunately, we find many businesses are unaware that their backend mail settings are not configured for optimum reliability and security.
When it comes to securing Gmail admin settings, it's crucial to have the correct DNS (Domain Name Settings) configured to prevent domain spoofing. What's domain spoofing? In simple terms, it's the unauthorized use of a third-party domain name, primarily in an email message, in order to pretend to be someone else. SPF, DKIM, and DMARC are all security standards followed in G Suite applications to keep your domain safe. SPF (Sender Policy Framework) records allow the user to easily identify spam messages for their domain. DKIM (Domainkeys Identified Mail) attaches a new domain name identifier and encrypts the message to validate authorization for the message, and DMARC (Domain-based Message Authentication, Reporting & Conformance) allows the user to instruct how Gmail handles unauthenticated emails coming from within the domain. These may all sound complicated but are quite necessary to keep your users and domain safe. Use the Google Toolbox MX checker to see if your domain is configured correctly. If there are issues you will see the following prompt when you run the check:

If this is what you see when you check your domain, contact us! We highly recommend using an expert to configure these security protocols as we've seen customers claim their IT staff has already set these up, only to find out later that it was configured incorrectly. This cost of properly setting these protocols up is negligible in comparison to the potential damage they prevent.

In our several years of experience, we've seen users simply don't realize the importance of having the proper DNS records set up, simply because it was not given importance or because it was too complicated for their IT staff to configure correctly. To help our cloud friends enjoy a safe and secure domain, InterlockIT will clean up your DNS records for FREE in exchange of transferring your G Suite subscription to us as your reseller (some conditions apply). It's a win win since you get free assistance to protect your domain as well as all the benefits of having a Google Cloud Partner. Contact us today and lets secure your domain!

Friday, June 16, 2017

The road to G Suite - A quick overview of the transition

G Suite offers many advantages as a professional productivity suite. Some notable ones are collaboration, uniformity, integration to other platforms, ease of access, and ease of use. This post aims to highlight some of these advantages and keys to establishing a successful implementation. Administrators and pilot users are certainly familiar with the time and effort it takes to teach end users a new software. Thanks to Google's focus on usability and user experience, G Suite is one of the easiest productivity suites to learn.
Globally welcomed and renowned, Google's software has become widely used and accepted by businesses and consumers alike. With over 1 billion monthly active Gmail users, folks have been exposed to at least one other Google product, such as Drive, Calendar, or Hangouts. Even if you haven't used many of the applications, just being exposed to them gives you a baseline of familiarity and eases the learning process. It's also very likely that your end users may already be using G Suite applications like Docs, which means they probably require minimal user training and can focus on more important tasks.

We live in a fast-paced business world which requires us to have tools that are easily accessible. Unfortunately many end users still believe business software can only be accessible on one specific platform and on one specific device at a time - those days are long gone! Google understands access needs vary from user to user. Some prefer a specific OS (Windows, Mac, or Android) and others prefer a specific device such as a laptop, desktop, or tablet. Because G Suite is cloud based and cross platform efficient, it can be accessed from any user’s preferred software and hardware configuration. Undeniably a familiar environment helps speed up the learning and work process.

Although G Suite is easy to use we sometimes find end users to still be mildly resistant to change as they're already comfortable with their current workflow. To ease the process, we recommend the following:

Make the announcement: of course it's best to let everyone know that changes will be occurring to improve their workflow and performance. Consider having the changeover announcement made by a high ranking person in the organization to help ensure users read their communication instead of just deleting it. Announcement of the change will collectively get the team aware and curious of what's to come.

Prepare for the change: implementation of a new platform brings with it some challenges and is not a short term matter. For example, changes to company policies may occur as the team gains access to the plethora of G Suite features. In order to ease user concerns, we recommend gradual adoption. There should be a clear plan for what changes to policy and workflow are needed over a clearly defined time frame. A well planned and communicated migration helps make transitioning easier on both your IT staff and your end users.

Educate everyone: hesitation should be expected and worked with. As mentioned before, many end users already have familiarity with and use Google products in their personal lives. Leverage this into showing them all the benefits G Suite has to offer. Organize training around teams with users that encourage learning on their own by using the system. InterlockIT provides in depth training on all G Suite products - get in touch here. Consider the advantage of G Suite’s cross platform capacity by allowing users to learn on hardware/software that they're comfortable with (if this is applicable) as it can quicken the learning process. We recommend Google's Chromebook to simplify workflow and easily administer your team.

It's understood that transitioning to a new productivity platform brings with it challenges that have to be properly addressed, but by putting user concerns at ease, having proper training, and a clear plan of action for implementation, your switch to G Suite should go smoothly and be viewed as an opportunity to grow and streamline your workflow. To learn more about migration services and G Suite deployment, contact our InterlockIT team today!

Friday, May 5, 2017

Machine learning in G Suite - How it increases productivity

Humans have been evolving rapidly over the last few centuries; from the agricultural age, to the industrial age, to now the information age. As we evolve so do our tools and the ways we interact with them. Take G Suite for example. Just over the last few years, G Suite has evolved from more than just an email and contacts solution, it now has the capacity to anticipate your business needs and facilitate collaboration and productivity at an unprecedented level.
Formatting documents, email management, and creating expense reports. These are just a few of the common time-consuming tasks that negatively affect productivity. Time spent working on tasks that do not directly relate to a creative output is costly and is referred to as 'overhead'. Unfortunately, huge overhead is common in most businesses and hinders valuable potential. According to a study by Google in 2015, the average worker spent roughly 5 percent of their time actually coming up with the next big idea. The remaining 95 percent of the time was dissolved in the form of formatting, tracking, analysis or other mundane tasks. With all these tools and efficiencies, one would think the percentages would be reversed. To make this possible, Google introduced what's known as machine learning.
What is machine learning? Essentially, machine learning algorithms observe input examples and make output predictions based on data. In G Suite, machine learning makes your workday more efficient by handling menial tasks, like scheduling meetings, or by predicting information you might need and surfacing it for you, like suggesting Docs for example.

Ever notice how you received less and less spam over the years with Gmail? One of the first applications to use machine learning was Gmail. Historically, Gmail used a rule-based system, meaning Google's anti-spam team would create new rules to match individual spam patterns. With over a decade worth of data and using this process, Gmail improved it's spam detection accuracy to 99%! It's now one of the most secure and spam free email applications in the world. To take it a step further, in 2014 Google augmented the rule-based system to generate rules using machine learning algorithms instead. This took spam detection to another level which now allows Gmail to continually regenerate the “spam filter”, so systems learn to predict which emails are most likely junk. Naturally, machine learning finds new patterns and adapts more quickly than previous manual systems - it’s a great reason for why there are more than one billion monthly active Gmail users today!

The goal of G Suite is to help teams accomplish more with an intelligent range of applications, no matter where they are in the world. Smart Reply for example, uses machine learning to generate three natural language responses to an email. If you find yourself away from the office or time-restricted and are in need of a quick way to clear your inbox,  you can let Smart Reply do it for you. Click here to learn more about Smart Reply.

Explore in Docs, Slides and Sheets uses machine learning to eliminate time spent on things like tracking down documents or information on the web, reformatting presentations or performing calculations within spreadsheets. The whole point of these tools is to help the user accomplish more with less.

Another great example of machine learning is Quick Access in Drive which predicts and suggests files you might need within Drive. Quick Access intelligently predicts files based on who you share files with frequently, when relevant meetings occur within your Calendar, or if you have patterns of using files at specific times of the day. Using predictions based on recent Drive activity greatly increases a users productivity and efficiency for day to day work.

To learn more about how machine intelligence can make work easier, check out this video from Google Cloud Next with Ryan Tabone, director of product management at Google, where he explains more about “overhead.” G Suite was made to make businesses run faster, smoother, and more efficiently. If those are things you're looking to adopt for your organization, give us a shout! We'd love to hear from you and discuss the possibilities for you business IT solutions.

Friday, April 28, 2017

How to better manage your G Suite domain as an administrator

G Suite is a package of cloud-based services that can provide your organization with an entirely new way to collaborate online. It's more than just email and chat, it provides video conferencing, social media, real-time document collaboration, and a powerful, yet under-rated, administration console for domain-wide management. Unfortunately, many organizations overlook the capabilities of the G Suite admin console. Hopefully this post will shed light on some of these capabilities. Here are a few great ways to better manage your G Suite domain as an administrator:

Add users and manage services in the Google Admin console:
This should be a no-brainer, but to allow folks in your organization to start using G Suite, you must add them to you account first.  To do this, you need to login to your Google Admin console (desktop or mobile). You can also use this console to manage all other aspects of your domain and users, including user services and password resets. 

Add layers of privacy and security:
G Suite includes many important security features that are designed to you company's data safe and protected. You can add additional layers of security to your users' accounts by enabling 2-step verification and enabling anti-spoofing measures to combat email abuse. Here are some security best practices to consider.

Control users' access to services and features:
By default, most services are turned on for all your users, but you can turn off the ones that you don't want users to use, via the admin console. You can even tailor how services work for specific users by applying different policies to different users. For example, you may want to turn on Google Hangouts for your entire sales team or allow only your support department to have 2-step verification.

Switch your business email to Gmail:
By default, users you add to your G Suite domain get an email address at the domain you provided when you created your account. If they're currently using this address with your old mail service, however, you decide when to make the switch. Mail will not start flowing to their Gmail account until the domain's MX records are changed to point to Google servers. Here's how to setup Gmail for your team.

Use a Google Cloud parter for deployment, training, and support:
To ensure a smooth transition to G Suite, Google recommends partners like us (Interlock IT) to provide a rich set of resources. Interlock IT provides end-user training, admin console training, support, and migration services to assist with your rollout. Here's a previous post one why you should use a Google Cloud partner. We also recommend using the G Suite learning centre for quickstart guides, videos, and additional tips. 

Grant admin privileges to your IT staff:
Regardless of the size of your organization, it's recommended that you distribute the responsibility of managing your users and services among a select group of trusted users. You can do this by granting administrator privileges to these users. Users that you have given admin privileges to arrive at the admin console just like you do. In comparison, users who do not have admin privileges do not see an admin console when they sign in, but rather go straight to their list of managed services. 

Manage new feature releases for your users:
Because G Suite is fully cloud-based, you and your users receive new features and updates automatically, without the need to install or update software. Some administrators prefer to know of these updates and want the ability to track upcoming releases. To do this, simply go to the release calendar or G Suite updates blog. You can also control when new features become available to your users by setting up your G Suite release process

Manage your mobile users remotely:
You can use the admin console to manage users' mobile devices, enforce security policies, remotely wipe lost/stolen devices, and much more. Here's how to manage your users' mobile devices.

Track usage and trends:
Adoption tracking is important; it's what tells you that your users are actually utilizing the tools available to them. By viewing the usage graphs and reports in your admin console, you can monitor how individual services are being used across your organization. This is a great visual to provide insight and assess your team's use of collaboration, identify unwanted security patterns, and even track other trends.

Add domains for free:
If your organization acquires a new domain name or has multiple domains, you can add all your domains to your account at no additional cost. This allows your users to have multiple identities across one or more of your domains while sharing services as part of single organization.

These are just a few useful things to know about the admin console. It's a highly versatile and capable tool to allow administrators unified control and management. Click here to learn more about the G Suite admin console or get in touch with us today

Friday, April 21, 2017

G Suite Series - Hangouts Chat & Meet

Companies understand the pain of hosting meetings with individuals outside their physical office space. Issues like weak signals, faulty plug-ins, and jammed telephone lines are often culprits for a 'less than pleasant' meeting experience.
Google understands this naturally, and innovated a solution. Their most recent update to Google Hangouts split it into two parts; Chat and Meet. Both consist of new features aimed to make the audio and visual communications between users, more convenient and direct. Chat and Meet, in a way, can be looked at as business counterparts to Google's consumer apps, Allo and Duo.

Here's what you need to know about Chat and Meet:

Hangouts Chat
If you're familiar with Slack, this is more or less Google's version of it but with superior conversation threading. Google Chat makes it easier to bring cross-functional teams together, discuss tasks that need to get done, and share collaborative work. It's designed to allow users to create virtual rooms where they can hold group conversations, and even break off into tangential threads. Available soon on Android, iOS, and web, it's perfect for practically anyone, on any device, anywhere.

Chat’s deep integration with G Suite means shared content from Drive and Docs, or photos and videos, can be viewed directly in conversations. It even includes filterable search to make it easy to find content dating back to the start of a project. The Chat platform supports a wide range of capabilities, from bots to simple scripting using Google App Script. It also integrates with third-party applications so teams can do more right from within the conversation. Chat also features @meet, an intelligent bot built on top of the Hangouts platform that uses natural language processing and machine learning to automatically schedule meetings for your team with Hangouts Meet and Google Calendar.

Hangouts Meet
The purpose of Google’s Hangouts Meet is to ease the process of starting a meeting, essentially eliminating the need for plug-ins and sign-ins. It's meant to kick-start a video conference using nothing more than a browser with a shared link, calendar invite, or an ad-hoc share. Unfortunately it's common to find cumbersome perquisites when simply attempting to join a meeting with other video conferencing software. Meet's primary goal is to make joining meetings effortless so that users can be as productive as they are when they're face-to-face.
Hangouts Meet allows up to 30 participants as opposed to only 10 in the earlier Hangouts version. What's even cooler is that with every meeting, a dial-in number containing a PIN code for instant access is provided for a frictionless experience. It's super easy to dial in from a conference room, laptop, or a mobile device using the dedicated app. Meet is available to all G Suite editions, however, the ability to create meetings with a dial-in phone number is only available in the Enterprise tier of G Suite. Here's how to manage meet for you organization and a handy cheat sheet to help you get started.

It's clear that Google is committed to building communication tools focused on the way teams work, from anywhere, at anytime. More than half of the workforce will contribute remotely by 2020, so businesses require purpose-built tools to help their employees succeed. As to why Google decided to evolve Hangouts into 2 solutions, it's probably an aim to deliver an easier approach for the two main entry-points that customers adhere to; collaborative messaging and video meetings.

Click here to see what you can do with the newest features of Hangouts. To learn more about Hangouts Chat or Meet, get in touch with us today!

Thursday, April 6, 2017

An easier way to login to G Suite

Google is soon rolling out a noticeable update to your sign-in page to give you an improved experience to securely sign in to your accounts. The purpose of this new design is to make browser sign-in flows consistent across computers, phones and tablets. Here's what it will look like on your desktop:
We find some G Suite users complain about an inconsistent login experience via multiple devices, especially if they aren't using a third party SSO (single sign-on) utility. Google heard the complaints and in addition to the improved aesthetics, the new Google sign-in page will remove the “Stay signed in” checkbox that at certain times appeared for G Suite customers. This checkbox has been the source of much confusion so removing the checkbox will enable users to remain signed in unless they specifically sign out. It's always recommended to use a private browser (incognito) window when using shared or public devices.
Users using a third-party SSO provider to access Google applications, such as Gmail, Calendar, Drive, etc., will not see any differences apart from the newly designed Google Accounts login page.

Users using a third-party SSO provider to access third-party applications will see an additional account selection page when they log in. This page will clarify which account they’re authenticating, as well as the permissions they’re granting to applications. All third-party SSO providers, including Active Directory Federation Services (ADFS) SSO, will use the new Google Accounts login process.
All G Suite users will be shown the account selection page, before or after being redirected to the third-party application, depending on whether they’re already signed in to their browser and the specific third-party application they’re accessing. It's important to note that after being prompted to confirm the correct Google account and granting the requested permissions upon initial login, only the account selection page will be shown again upon subsequent login attempts. Existing G Suite users who use Google as their identity provider, will not be affected by the changes and will only see the redesigned Google sign-in page.

Removal of an account from the sign-in page is easy, this can be done from the account selection page by clicking the “Remove an account” link.
Hopefully this will assist in resolving issues for G Suite users on multiple devices and users who use an SSO utility. The update will rollout on Monday, April 10, to a small set of users and will ramp up slowly over the course of several weeks. Additional details about this update can be found on the Google support page.

Get in touch with us today to learn more about G Suite and how it can make your business processes faster, safer, and more efficient!